A room is the place where you schedule and hold your meetings, akin to a physical conference room.
Every room keeps a meeting history including the agendas, minutes, full transcripts (and chat logs), and attendance records for all the meetings held in that room. The meeting history and meeting details are accessible to all the meeting room's team members. However, a person can participate directly only in meetings to which they are invited.
People designated as room managers can schedule meetings in that room, update the list of room members, and change the room settings.

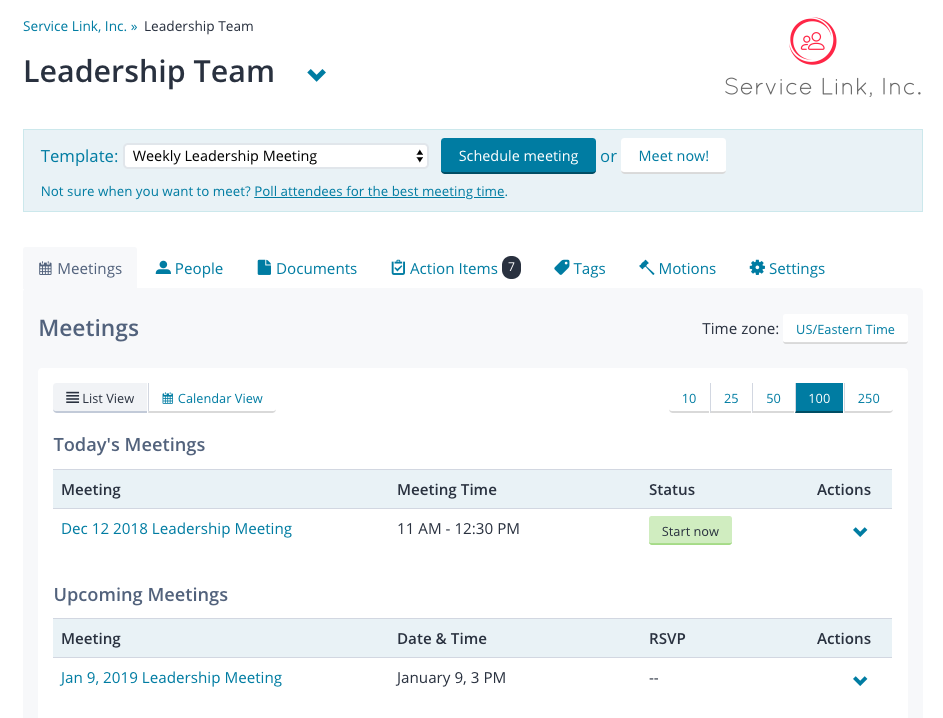
Room manager's view of the Room Home page
Managing Rooms
Organization owners and organization administrators can manage the rooms in an organization.
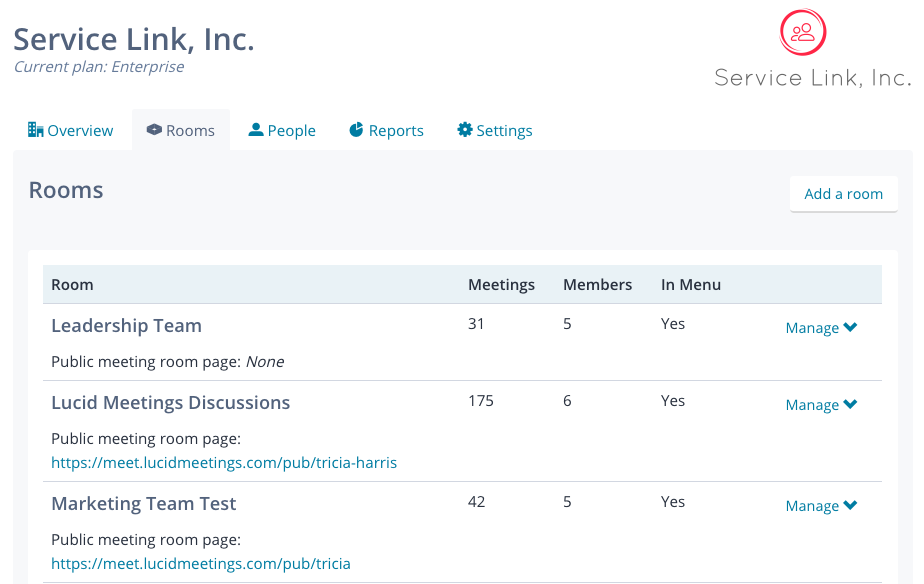
The organization's Rooms tab lists all the rooms in your organization. This includes any rooms that you don't see in your main navigation because you are not a member of them.
Each meeting room has its own roster of team members, including who manages the room.

Rooms tab for an organization
To Get to an Organization's Rooms Tab
- Select your organization's name from the main navigation menu.
- Select the Rooms tab.
Adding a Meeting Room
You can add meeting rooms as needed.
To add a meeting room
- Navigate to your organization's Rooms tab.
- Click the Add a room link.
- Fill in the form with the new room's name and settings, and click Save.
When you add a room, you will land on the new room's home page. You can make further changes to the room's configuration there, including selecting a different manager for the room.
Learn more about managing a meeting room.
Editing the Name, Visibility or Logo of a Meeting Room
You can change the name of a Meeting Room, determine whether or not it shows up in the navigation, and add a specific logo that is different from your organization.
To edit the appearance of a meeting room:
- Navigate to your organization's Rooms tab.
- Find the room you want to delete among the listed rooms.
- Click the Actions menu (button with arrow icon) for that room, and select Manage > Change menu visibility.
- Edit the settings, then click Save.
Other Room Actions
To make any other changes to a room, click on the room name from the left navigation or the Rooms tab of the organization home page, and select the room's Settings tab.
Deleting a Meeting Room
You can remove unnecessary meeting rooms at any time.
To delete a meeting room:
- Navigate to your organization's Rooms tab.
- Find the room you want to delete among the listed rooms.
- Click Manage and select Delete.
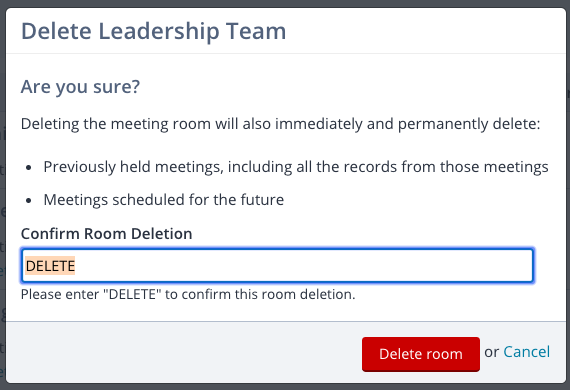
- To confirm deletion, type "DELETE" in all capital letters on the confirmation screen, then select Delete room (see screenshot below).
WARNING: If you delete a meeting room, all of its contents will be deleted including all past and future meeting information. Deleted information cannot be recovered. We recommend downloading all meeting minutes for offline storage prior to deleting a room.


Type "DELETE" to confirm room deletion
